
How to Use Drawing Tools on PDFs in Helperbird
Learn how to draw on PDFs with Helperbird's pen, shape, arrow, and line tools. A step-by-step guide to marking up any PDF document.
Jump to the stepsOn this page
PDF drawing is free. Open a PDF and choose Draw to begin.
What are PDF Drawing Tools?
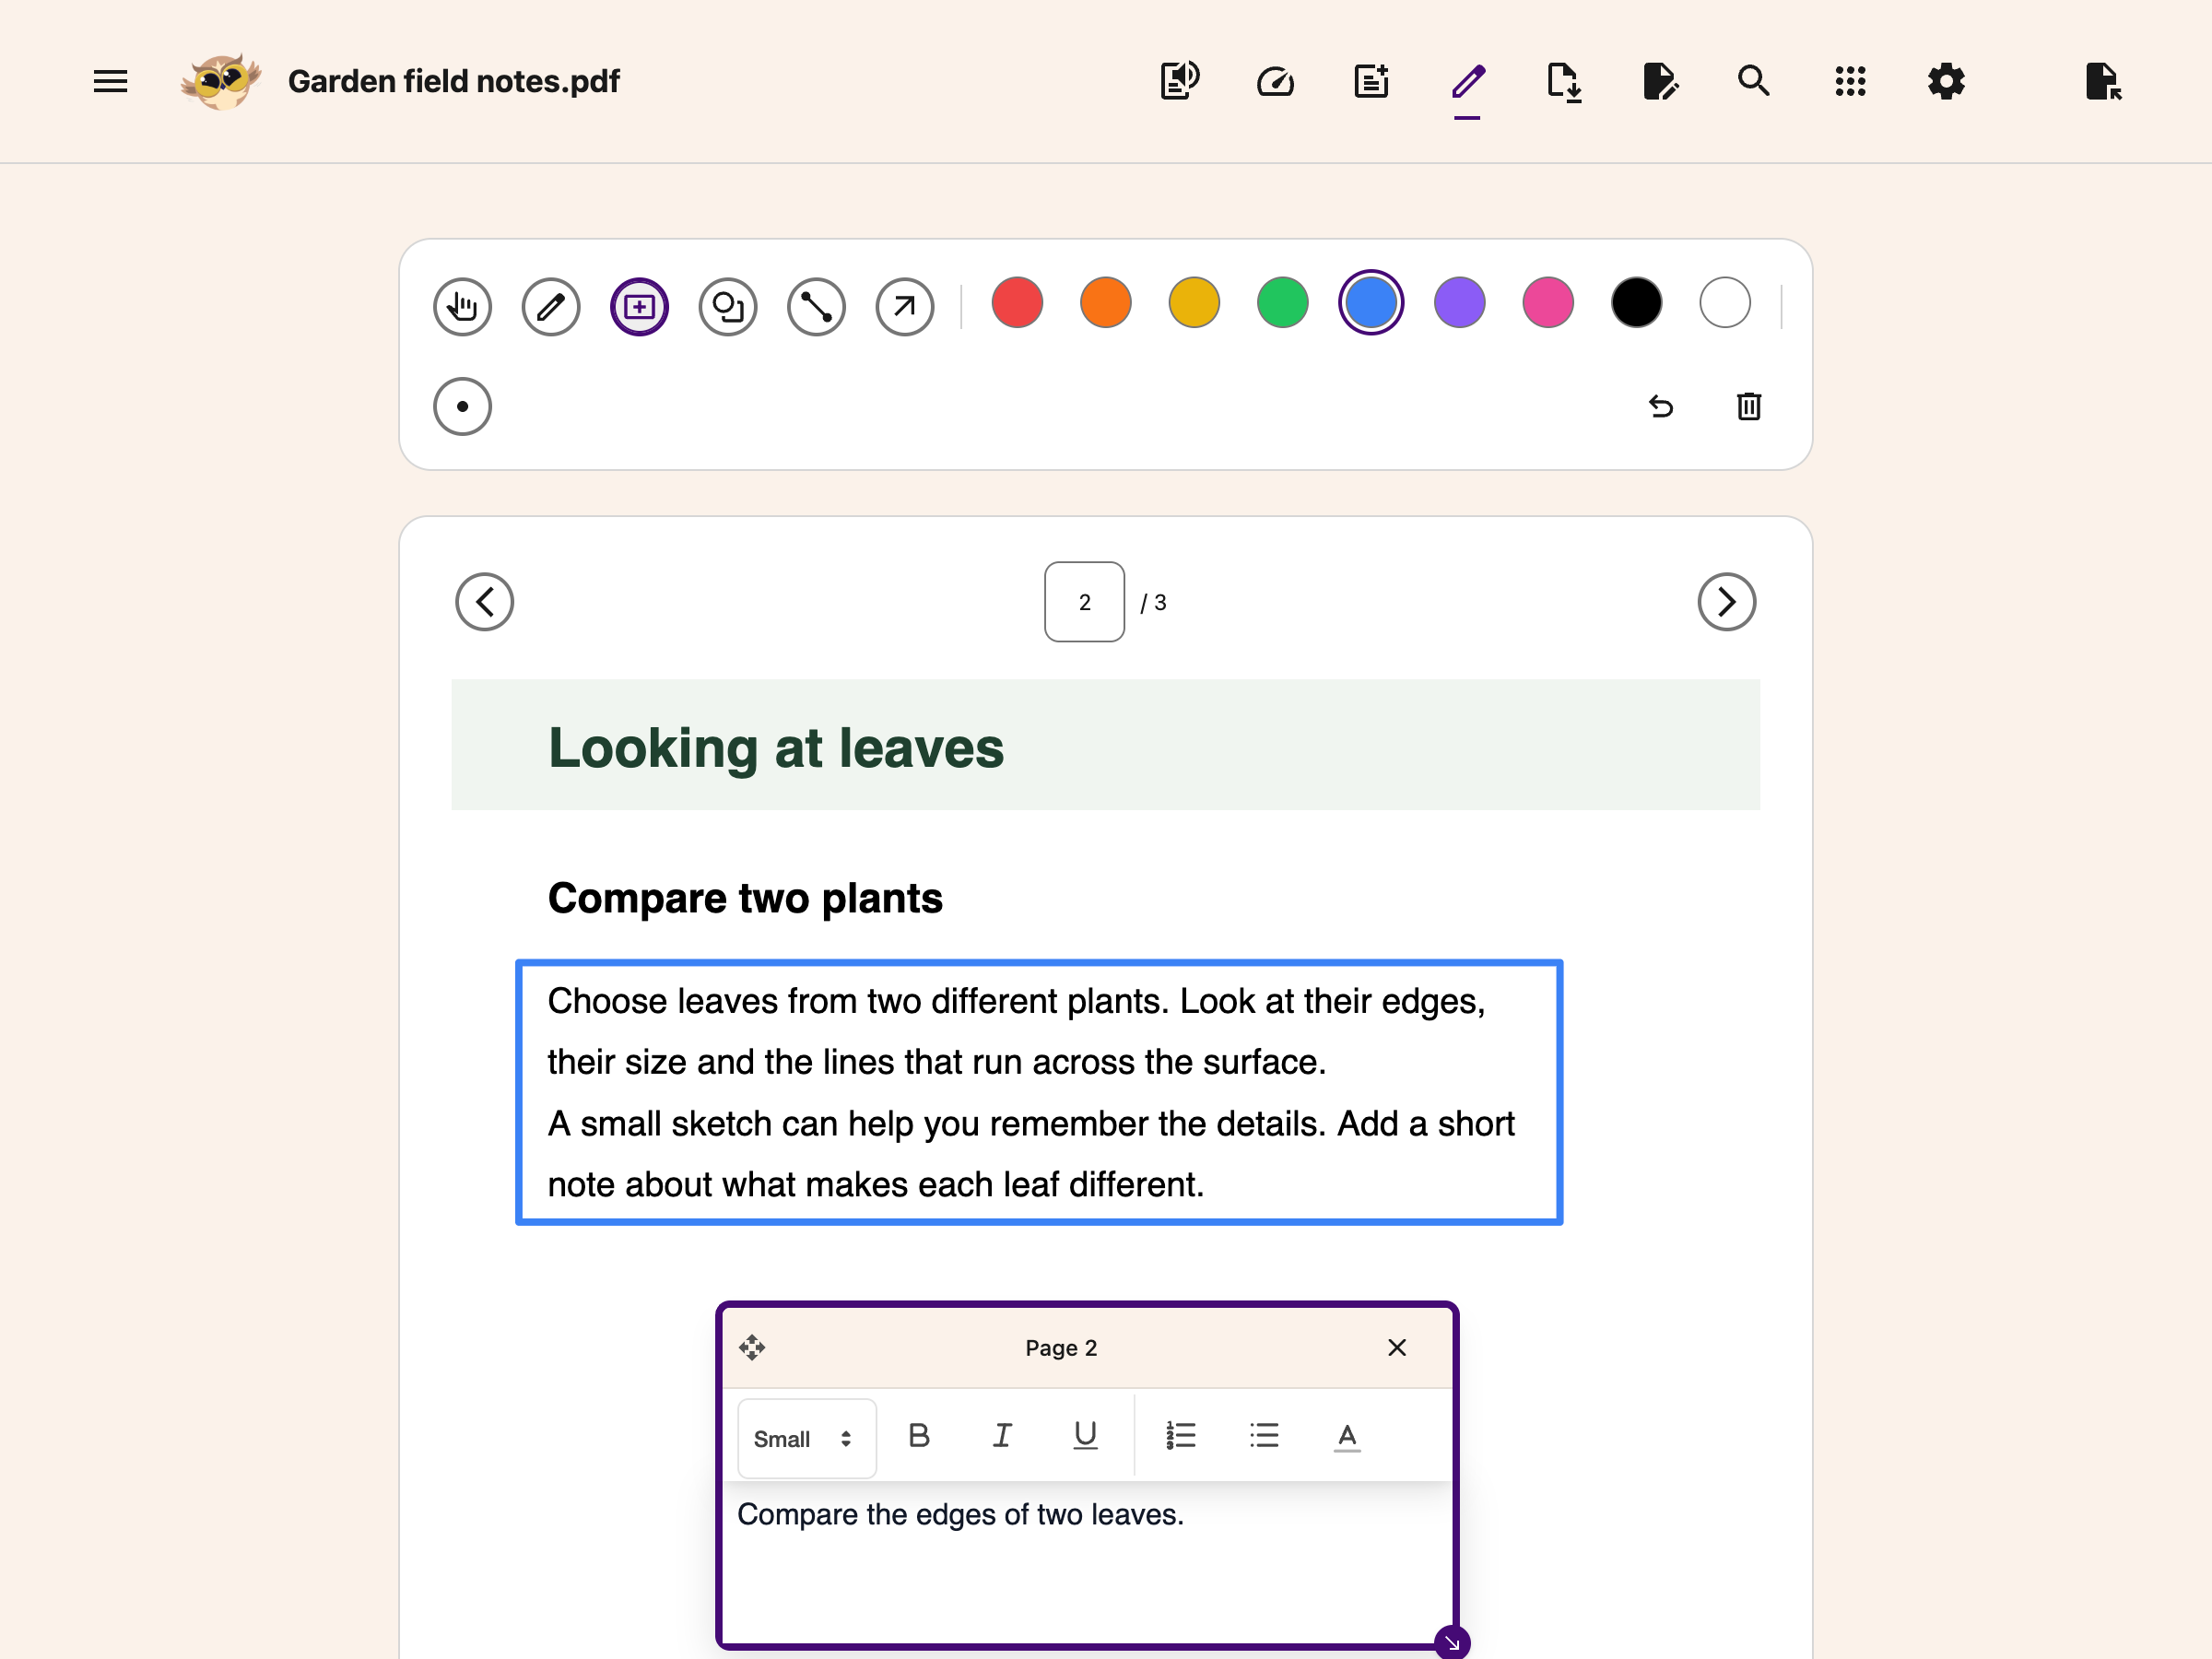
PDF Drawing Tools let you draw directly on any PDF document in Helperbird's PDF Reader. You can use a freehand pen, draw rectangles, ovals, straight lines, and arrows. You can choose from multiple colors, adjust the line thickness, and move or delete individual drawings.
Your drawings stay visible even when you close the drawing toolbar, and you can download the PDF with all your drawings included.
 View full-size image (opens in a new tab)
Who is This For?
This feature is helpful for:
- Students who want to circle, underline, or annotate study materials
- Teachers providing visual feedback on assignments
- Researchers marking up papers and highlighting key data
- Professionals reviewing documents, designs, or reports
- Anyone who prefers visual annotation over typed notes
Step 1: Open a PDF in Helperbird
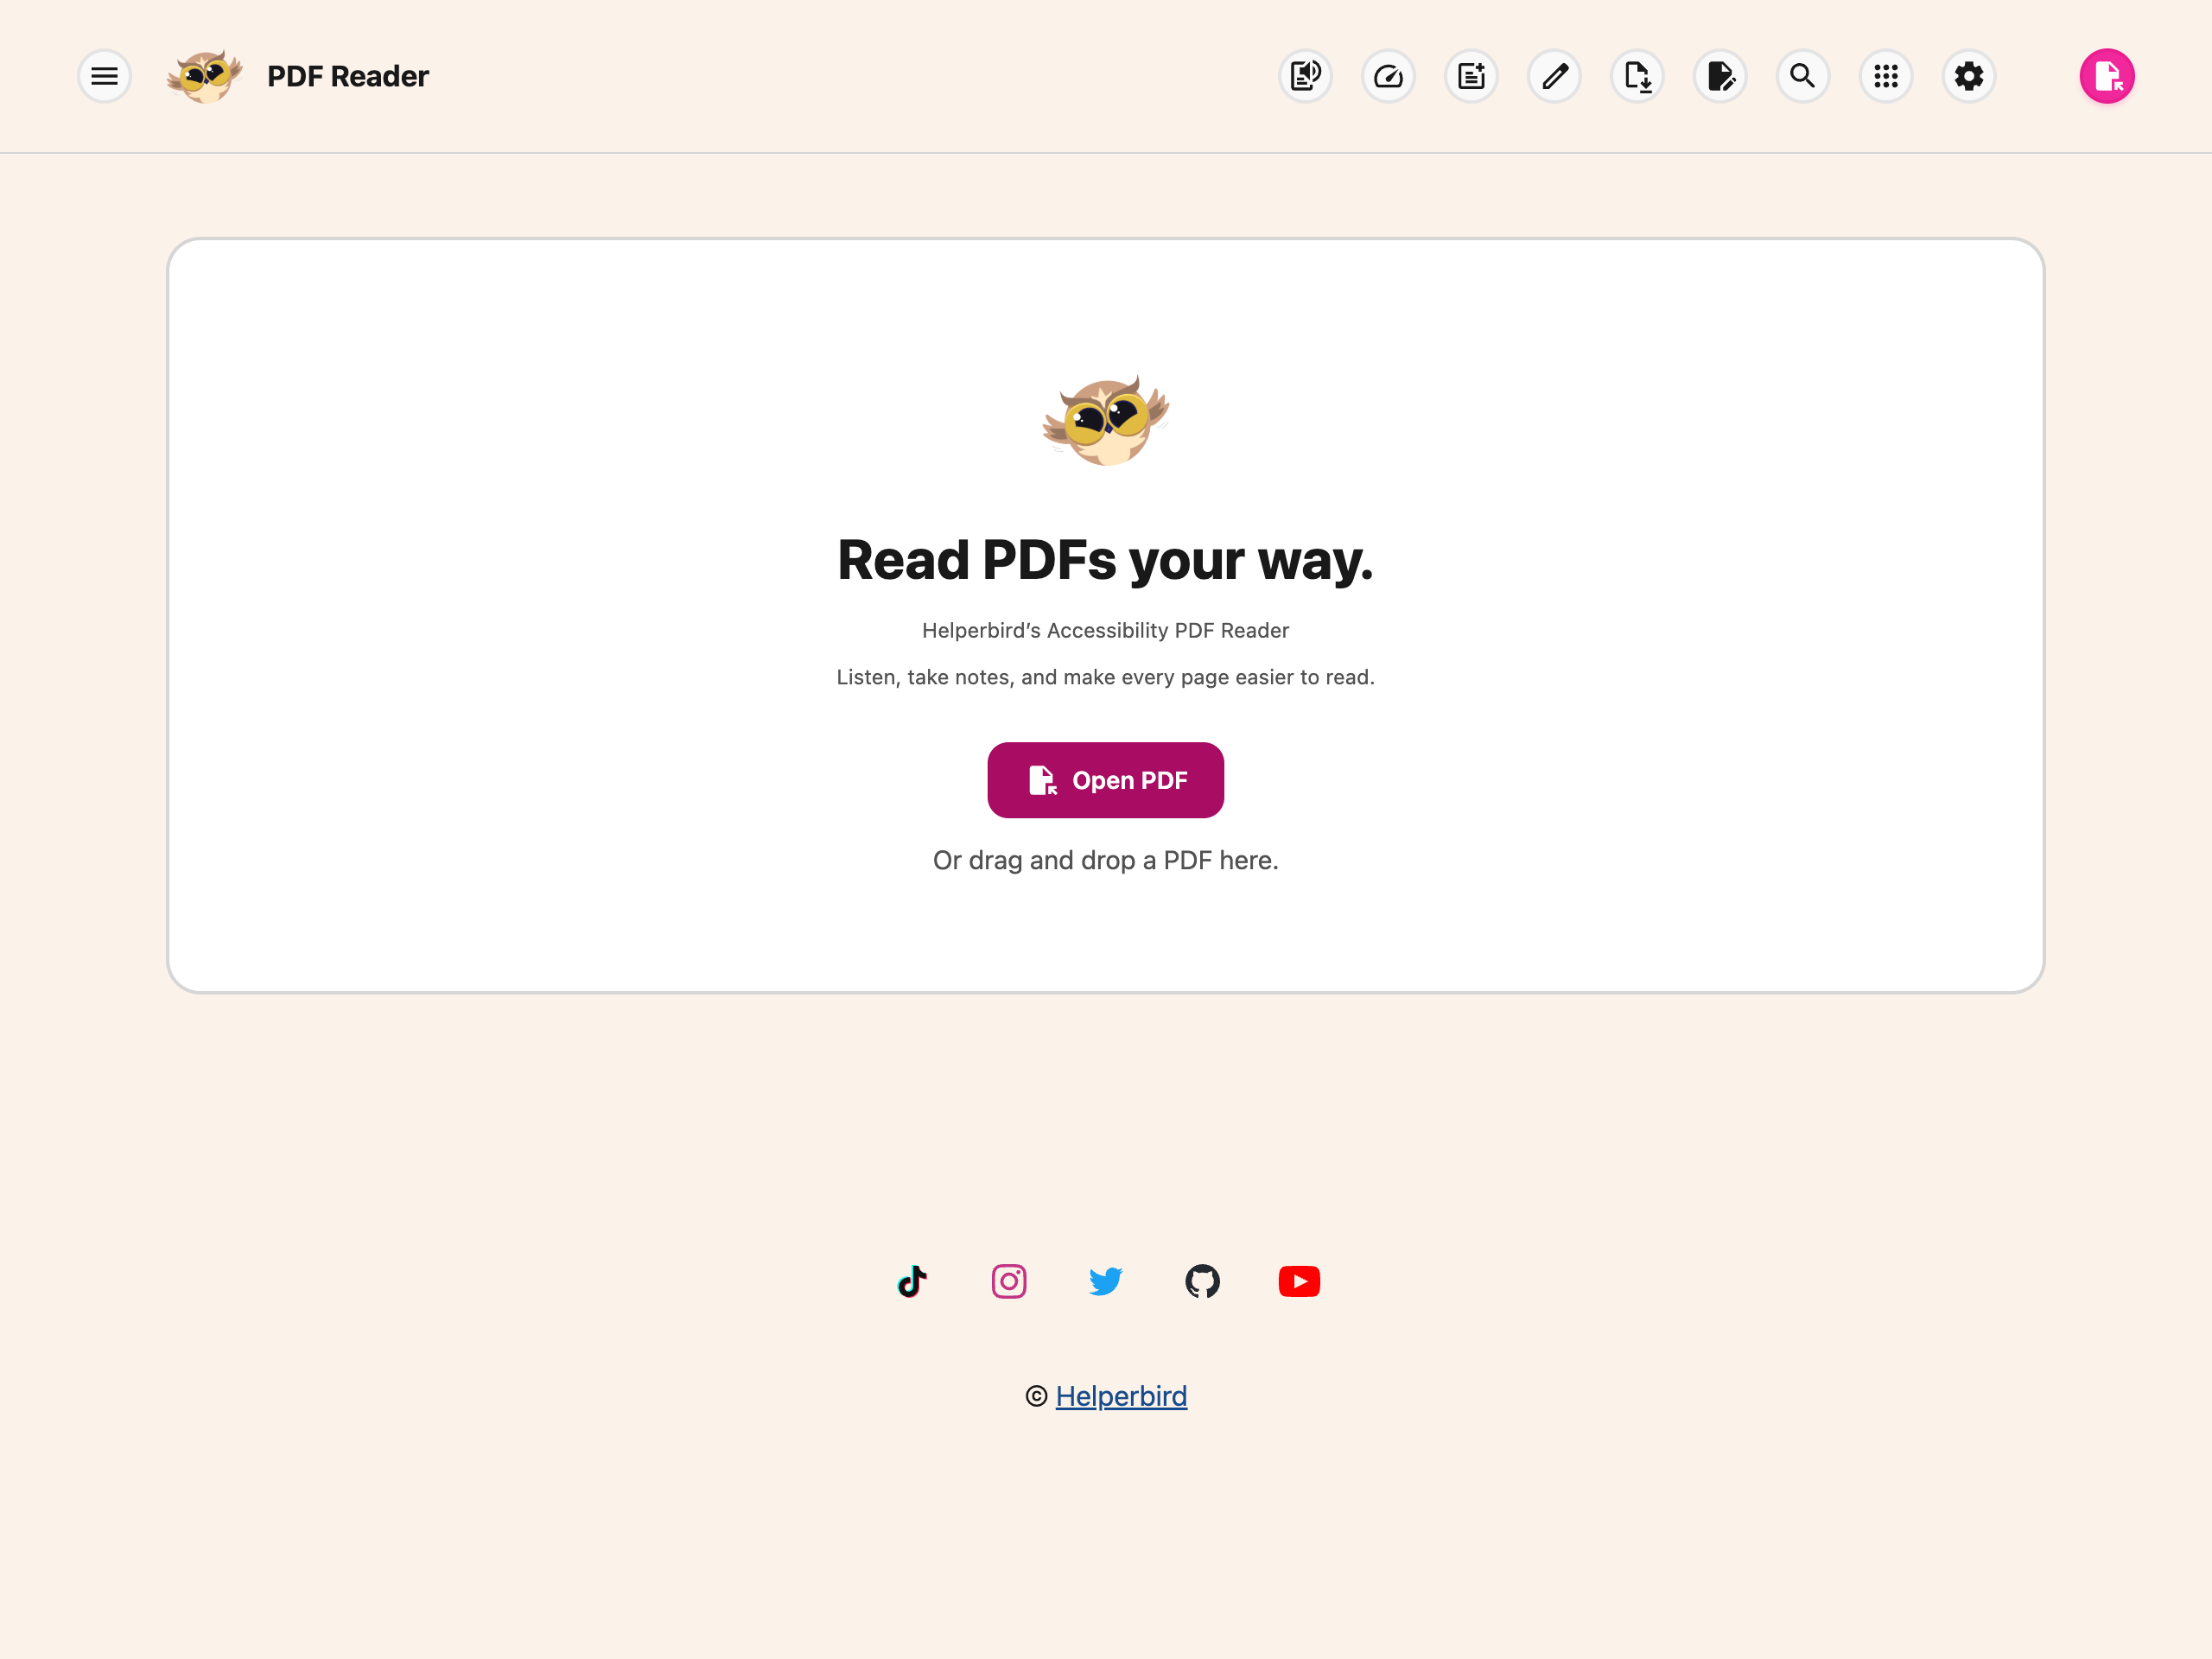
Open the PDF Reader, choose Open PDF, and select a file from your device. The page appears with its reading controls above it.
 View full-size image (opens in a new tab)
Step 2: Open the Drawing Toolbar
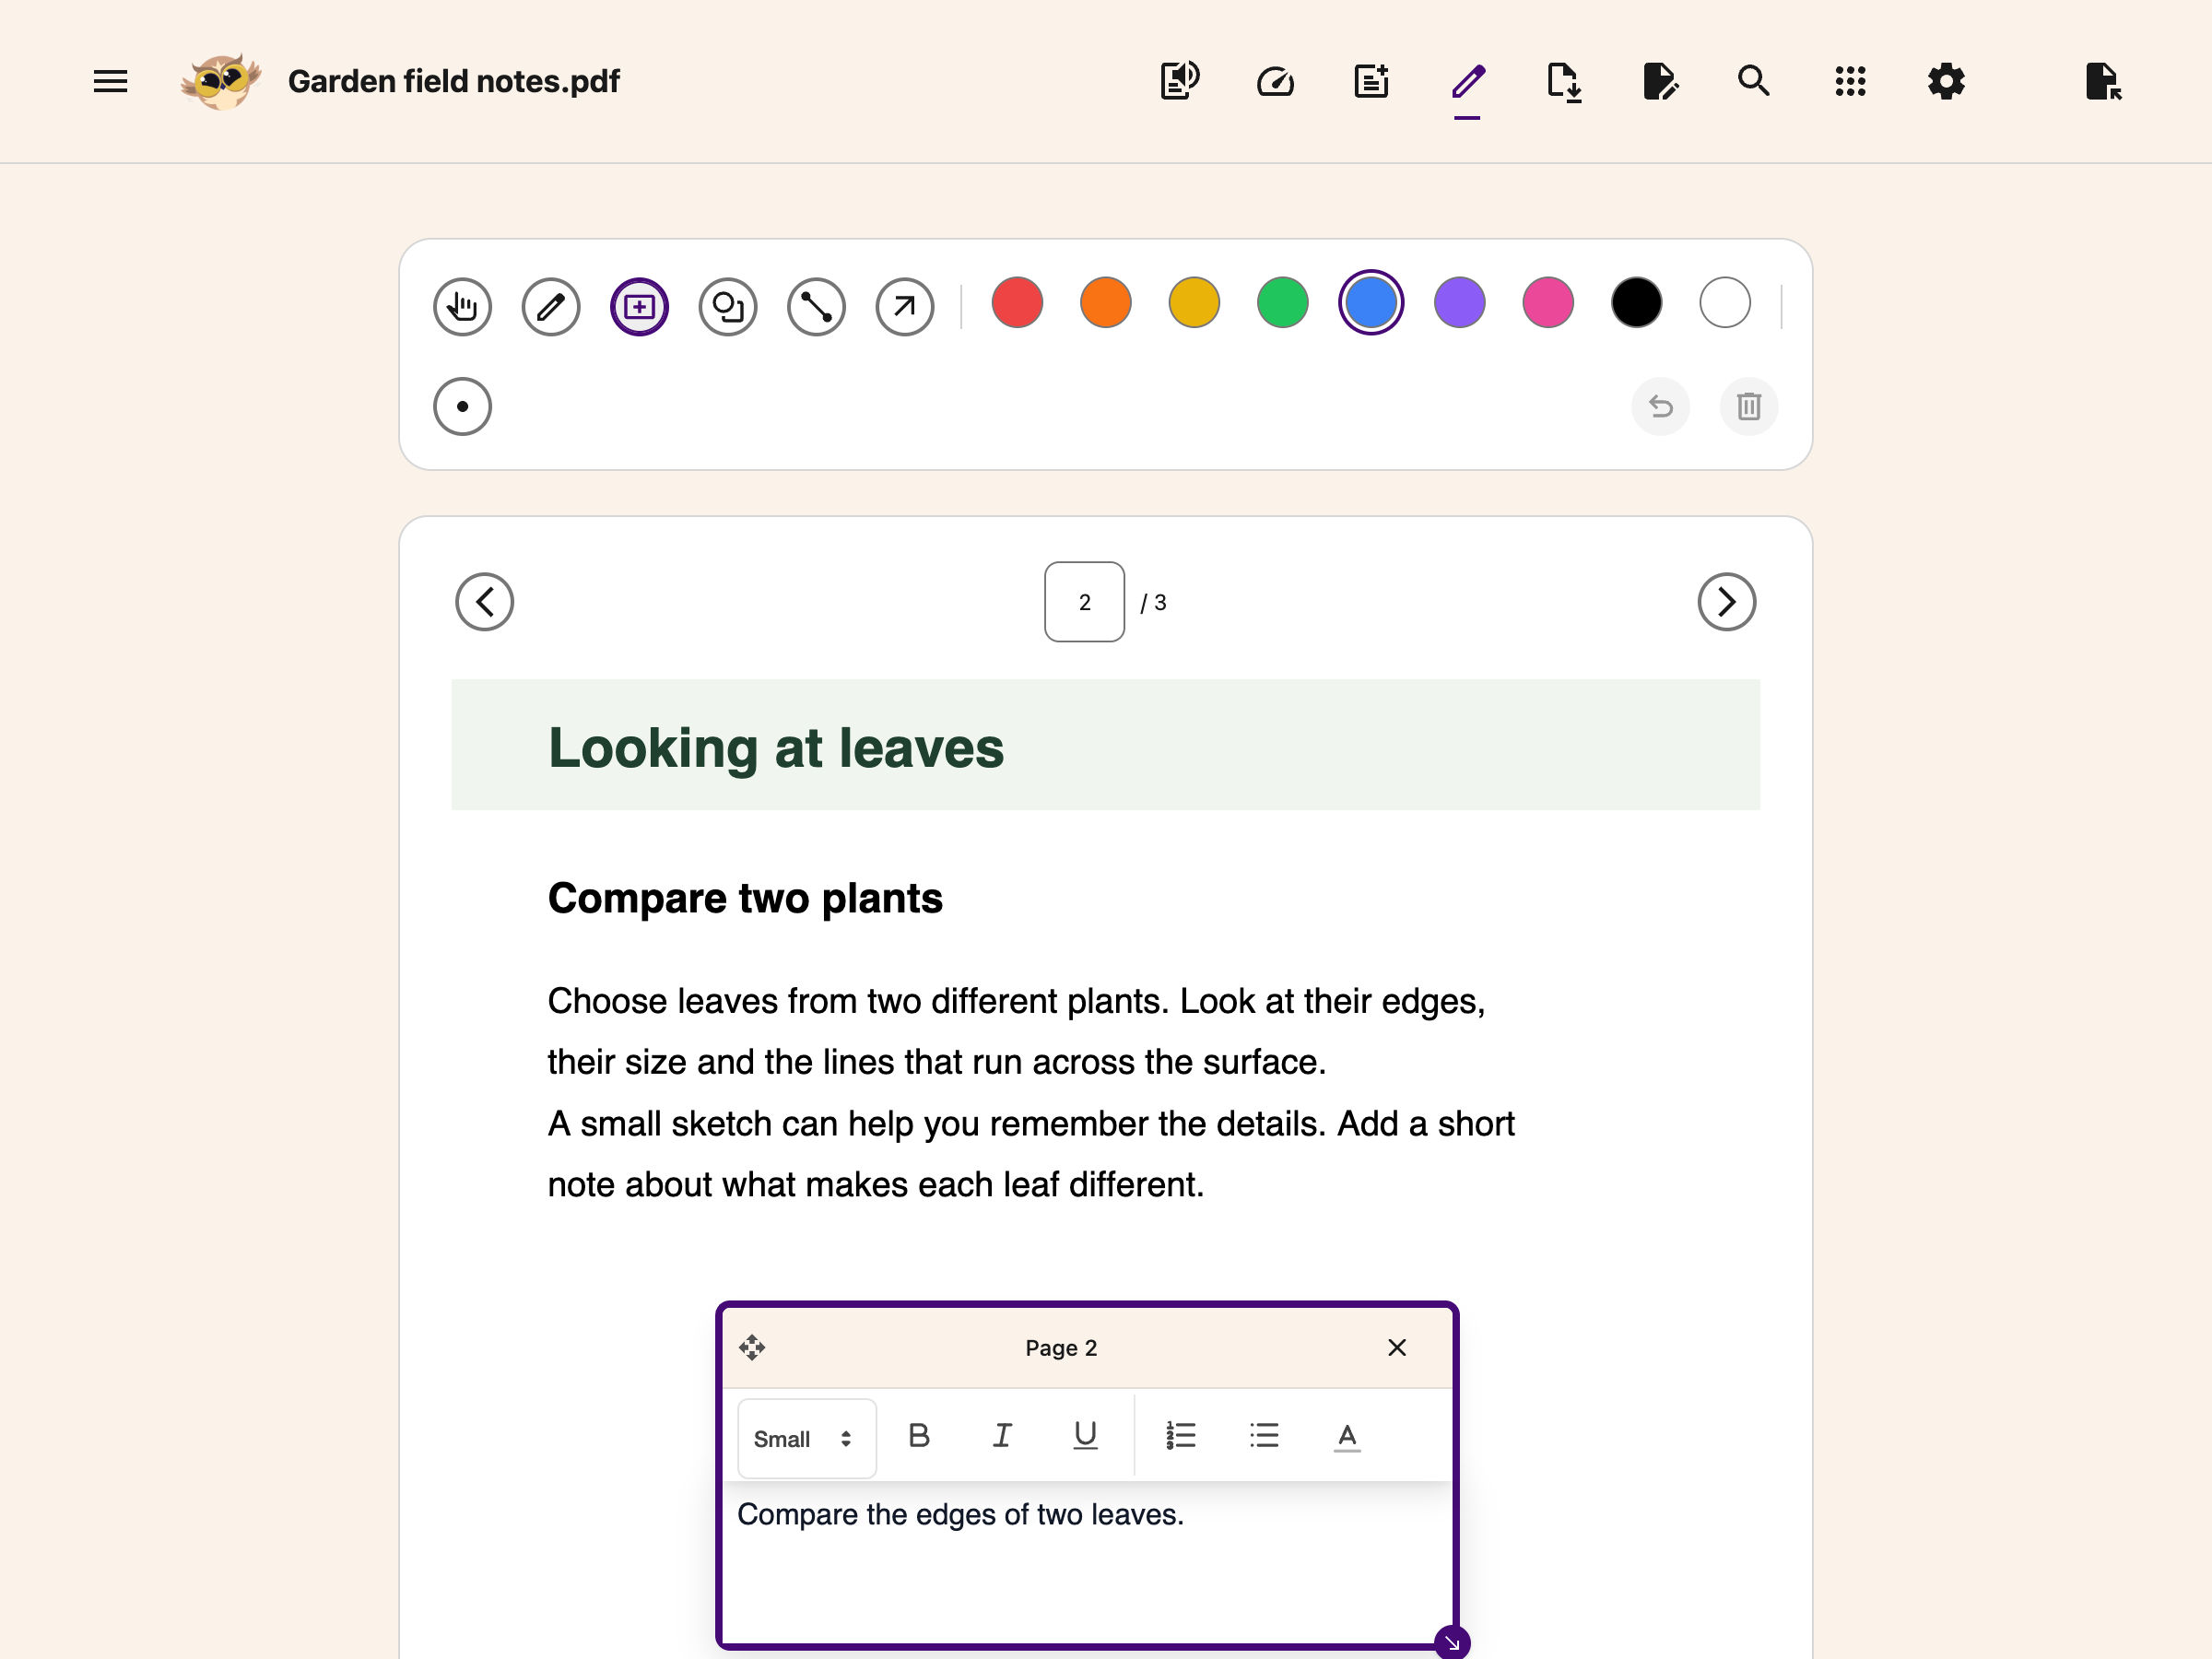
In the toolbar at the top of the PDF Reader, click the Draw button (the pencil icon).
A drawing toolbar will appear below the main toolbar. This bar contains all your drawing tools, color options, and stroke controls.
 View full-size image (opens in a new tab)
Step 3: Choose a Tool
The drawing toolbar gives you six tools to work with:
- Select / Move - Click on existing drawings to select, move, or delete them
- Pen - Draw freehand lines and shapes with your mouse or finger
- Rectangle - Click and drag to draw a rectangle
- Oval - Click and drag to draw an oval or circle
- Line - Click and drag to draw a straight line
- Arrow - Click and drag to draw a line with an arrowhead at the end
View full-size image (opens in a new tab)
Click on a tool to activate it. The active tool is highlighted so you can always see which one is selected.
Step 4: Pick a Color and Stroke Width
Colors: Choose from nine colors in the toolbar: red, orange, yellow, green, blue, purple, pink, black, and white. Click a color swatch to select it. The active color has a visible ring around it.
View full-size image (opens in a new tab)
Stroke width: Click the stroke width button to cycle through four sizes: thin (2px), medium (4px), thick (6px), and extra-thick (8px). The button shows the current width so you always know what you're working with.
Step 5: Draw on the PDF
With your tool and color selected, click and drag on the PDF page to draw.
- For the pen tool, hold down the mouse button and move to draw freehand.
- For shapes, lines, and arrows, click where you want to start, drag to set the size and direction, then release.
Your drawing appears immediately on the page.
View full-size image (opens in a new tab)
Step 6: Select, Move, and Delete Drawings
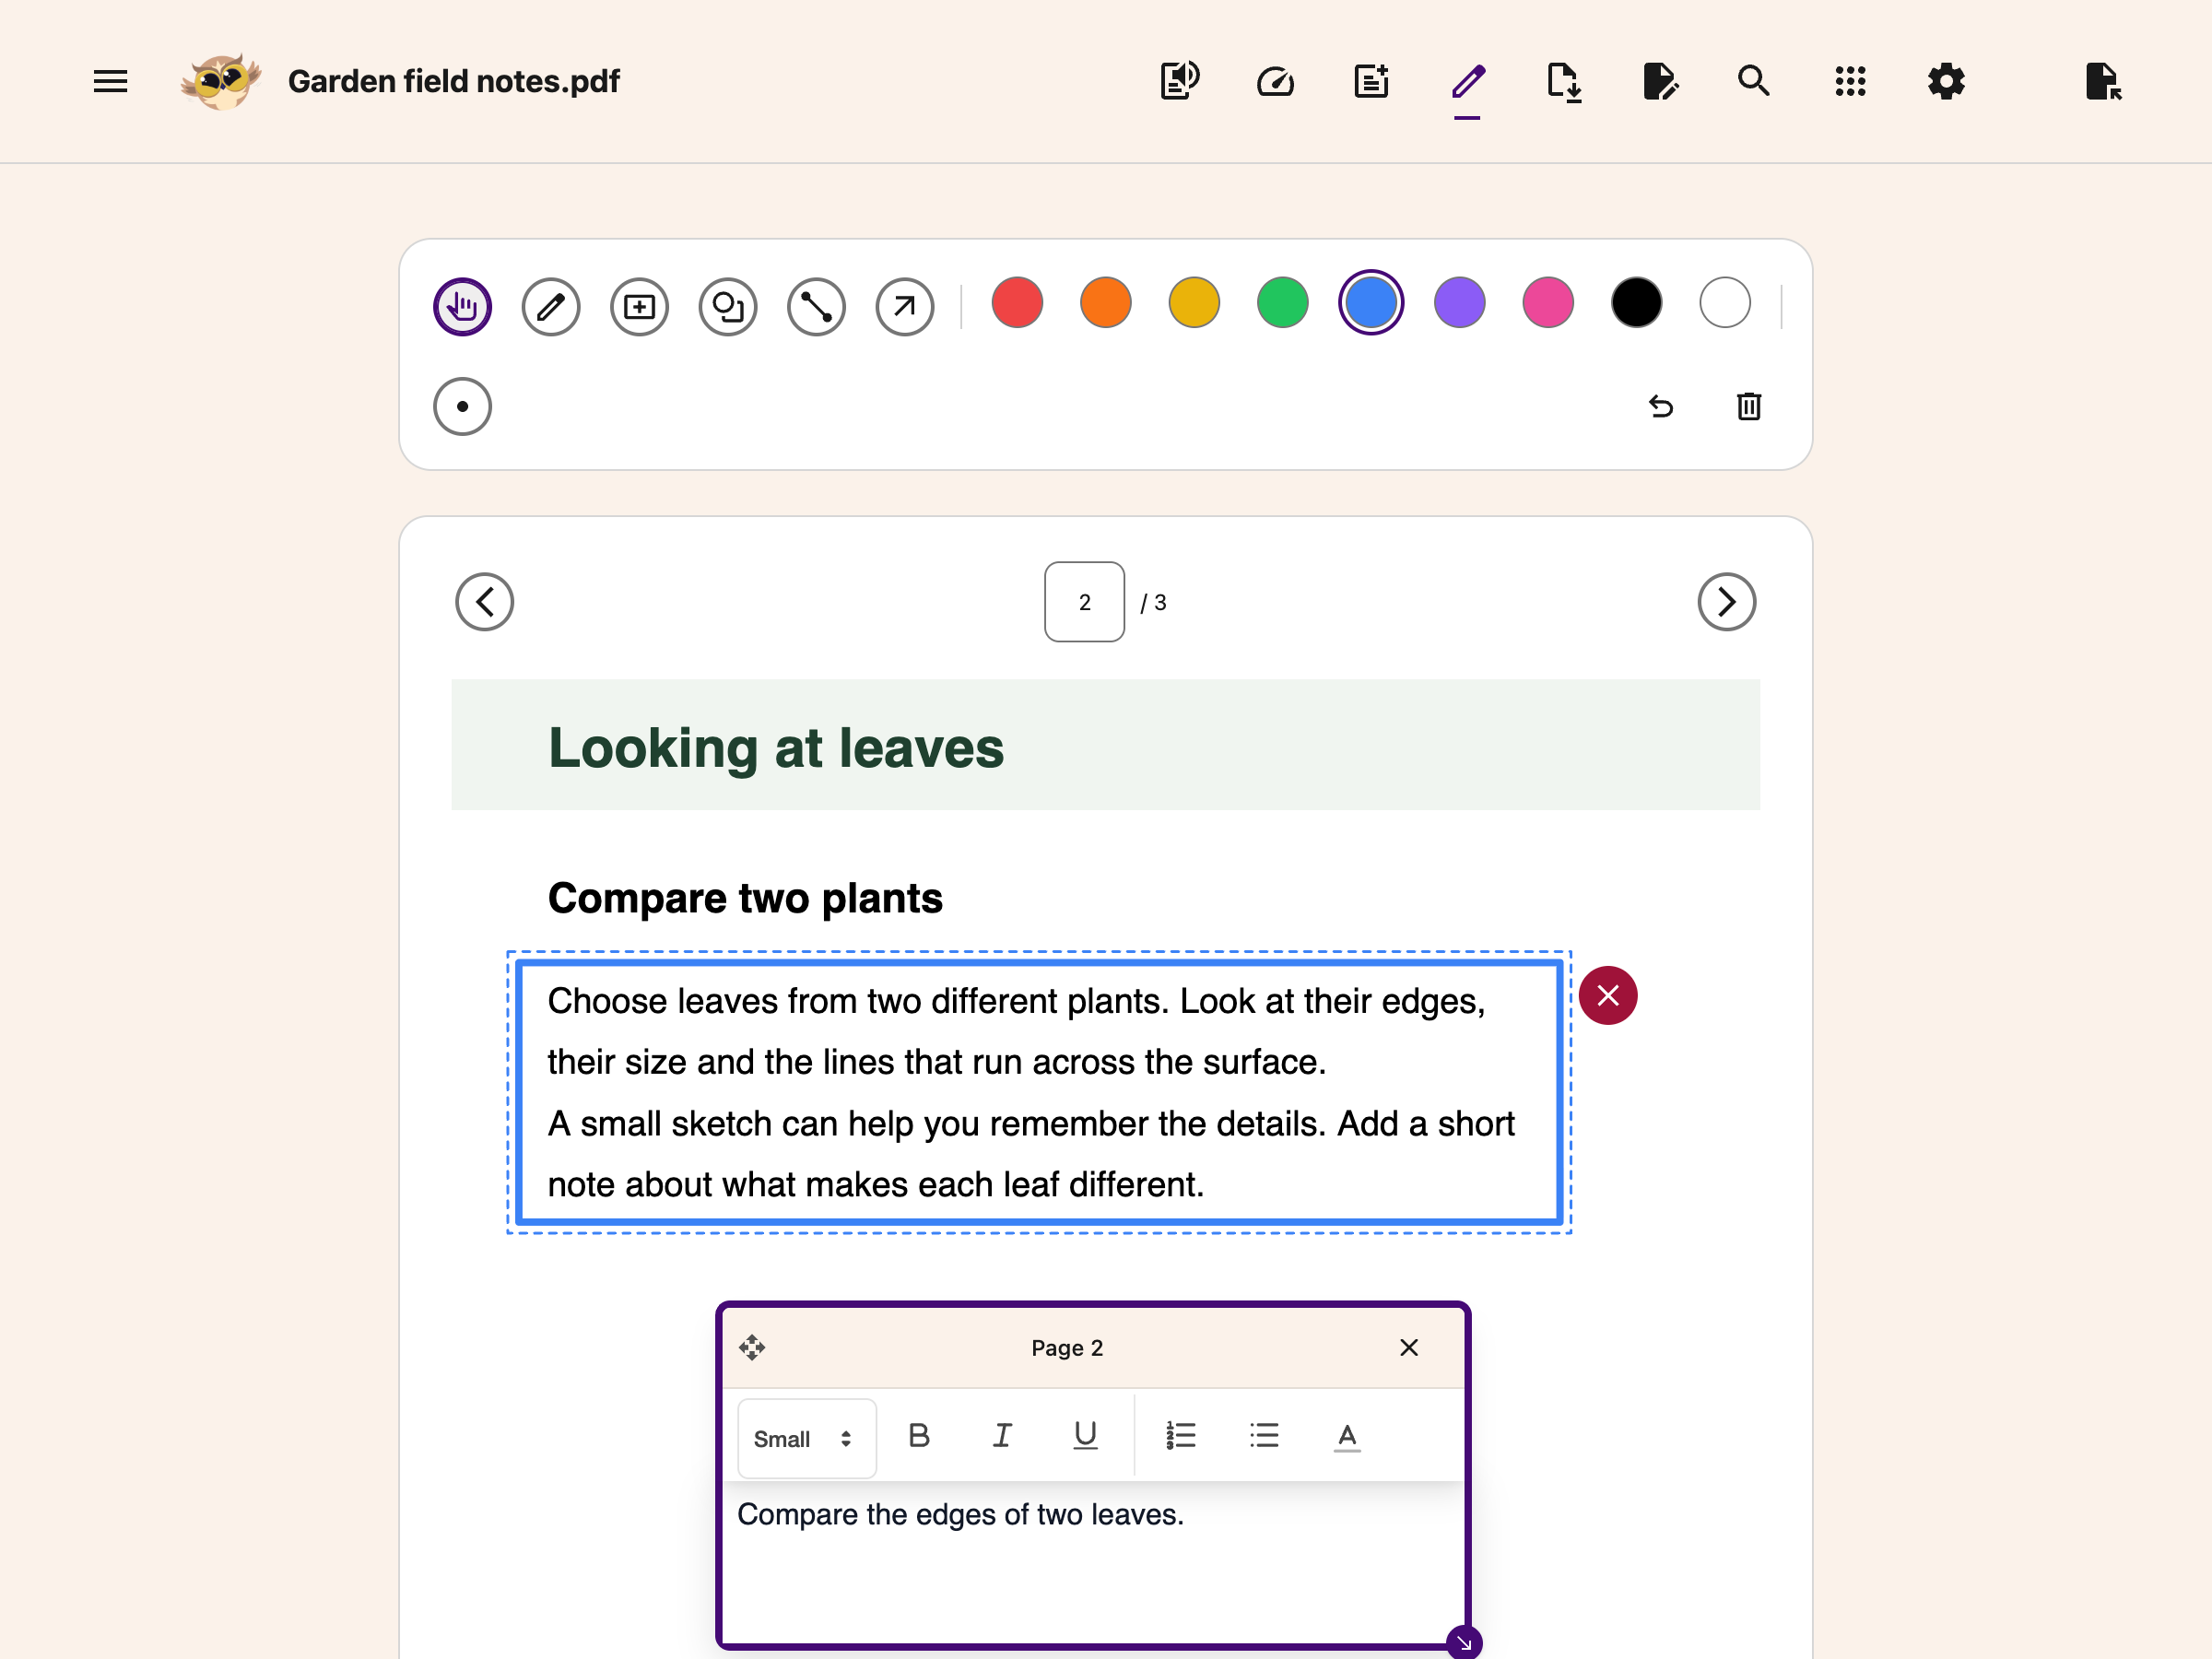
Switch to the Select / Move tool to interact with existing drawings.
To select: Click on any drawing. A dashed blue outline will appear around it, and a small red delete button will show at the corner.
To move: Click and drag a selected drawing to reposition it anywhere on the page.
To delete: Click the red delete button on a selected drawing, or press the Delete or Backspace key on your keyboard.
 View full-size image (opens in a new tab)
Step 7: Undo or Clear Drawings
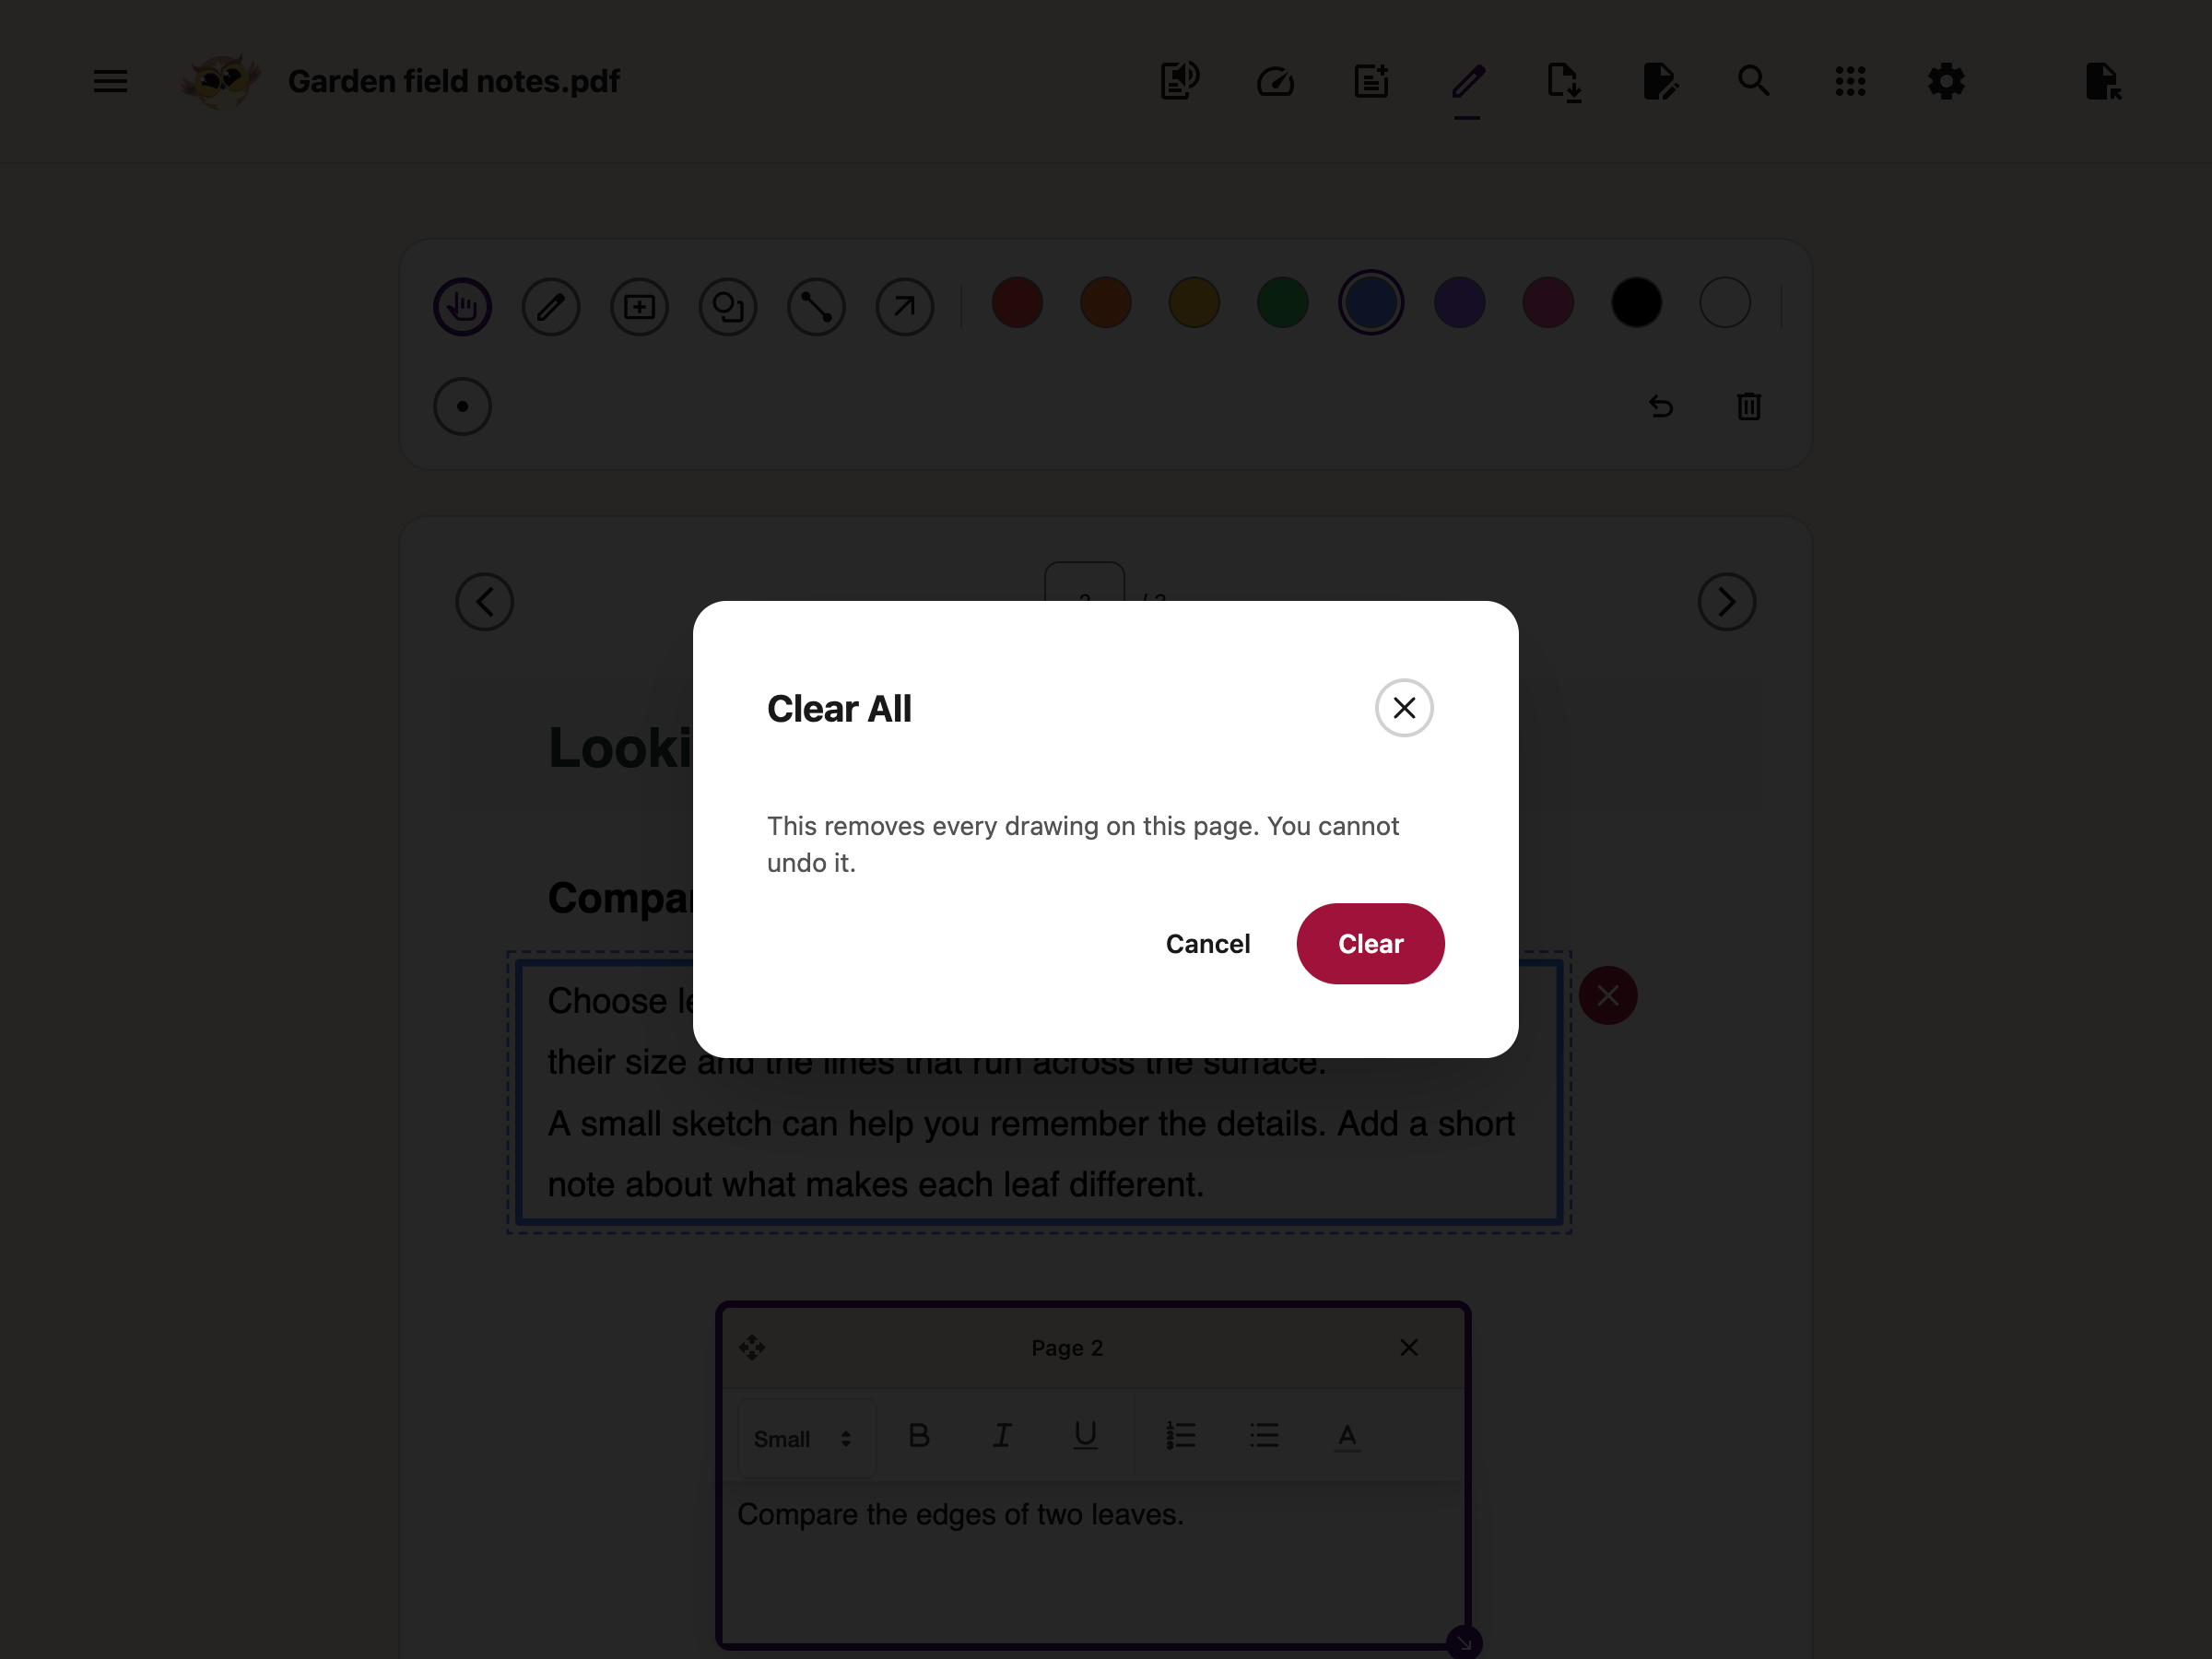
Undo: Click the Undo button in the drawing toolbar to remove the last drawing you made on the current page.
Clear all: Click Clear All. A confirmation explains that every drawing on this page will be removed. Choose Cancel to keep them, or confirm to clear them. Clearing cannot be undone.
 View full-size image (opens in a new tab)
Step 8: Close the Toolbar
Click the Draw button again in the main toolbar to close the drawing toolbar.
Your drawings stay visible on the PDF. You can continue reading, navigating pages, or using other Helperbird features. Your marks remain exactly where you placed them.
To make changes, just open the drawing toolbar again.
Step 9: Download Your Marked-Up PDF
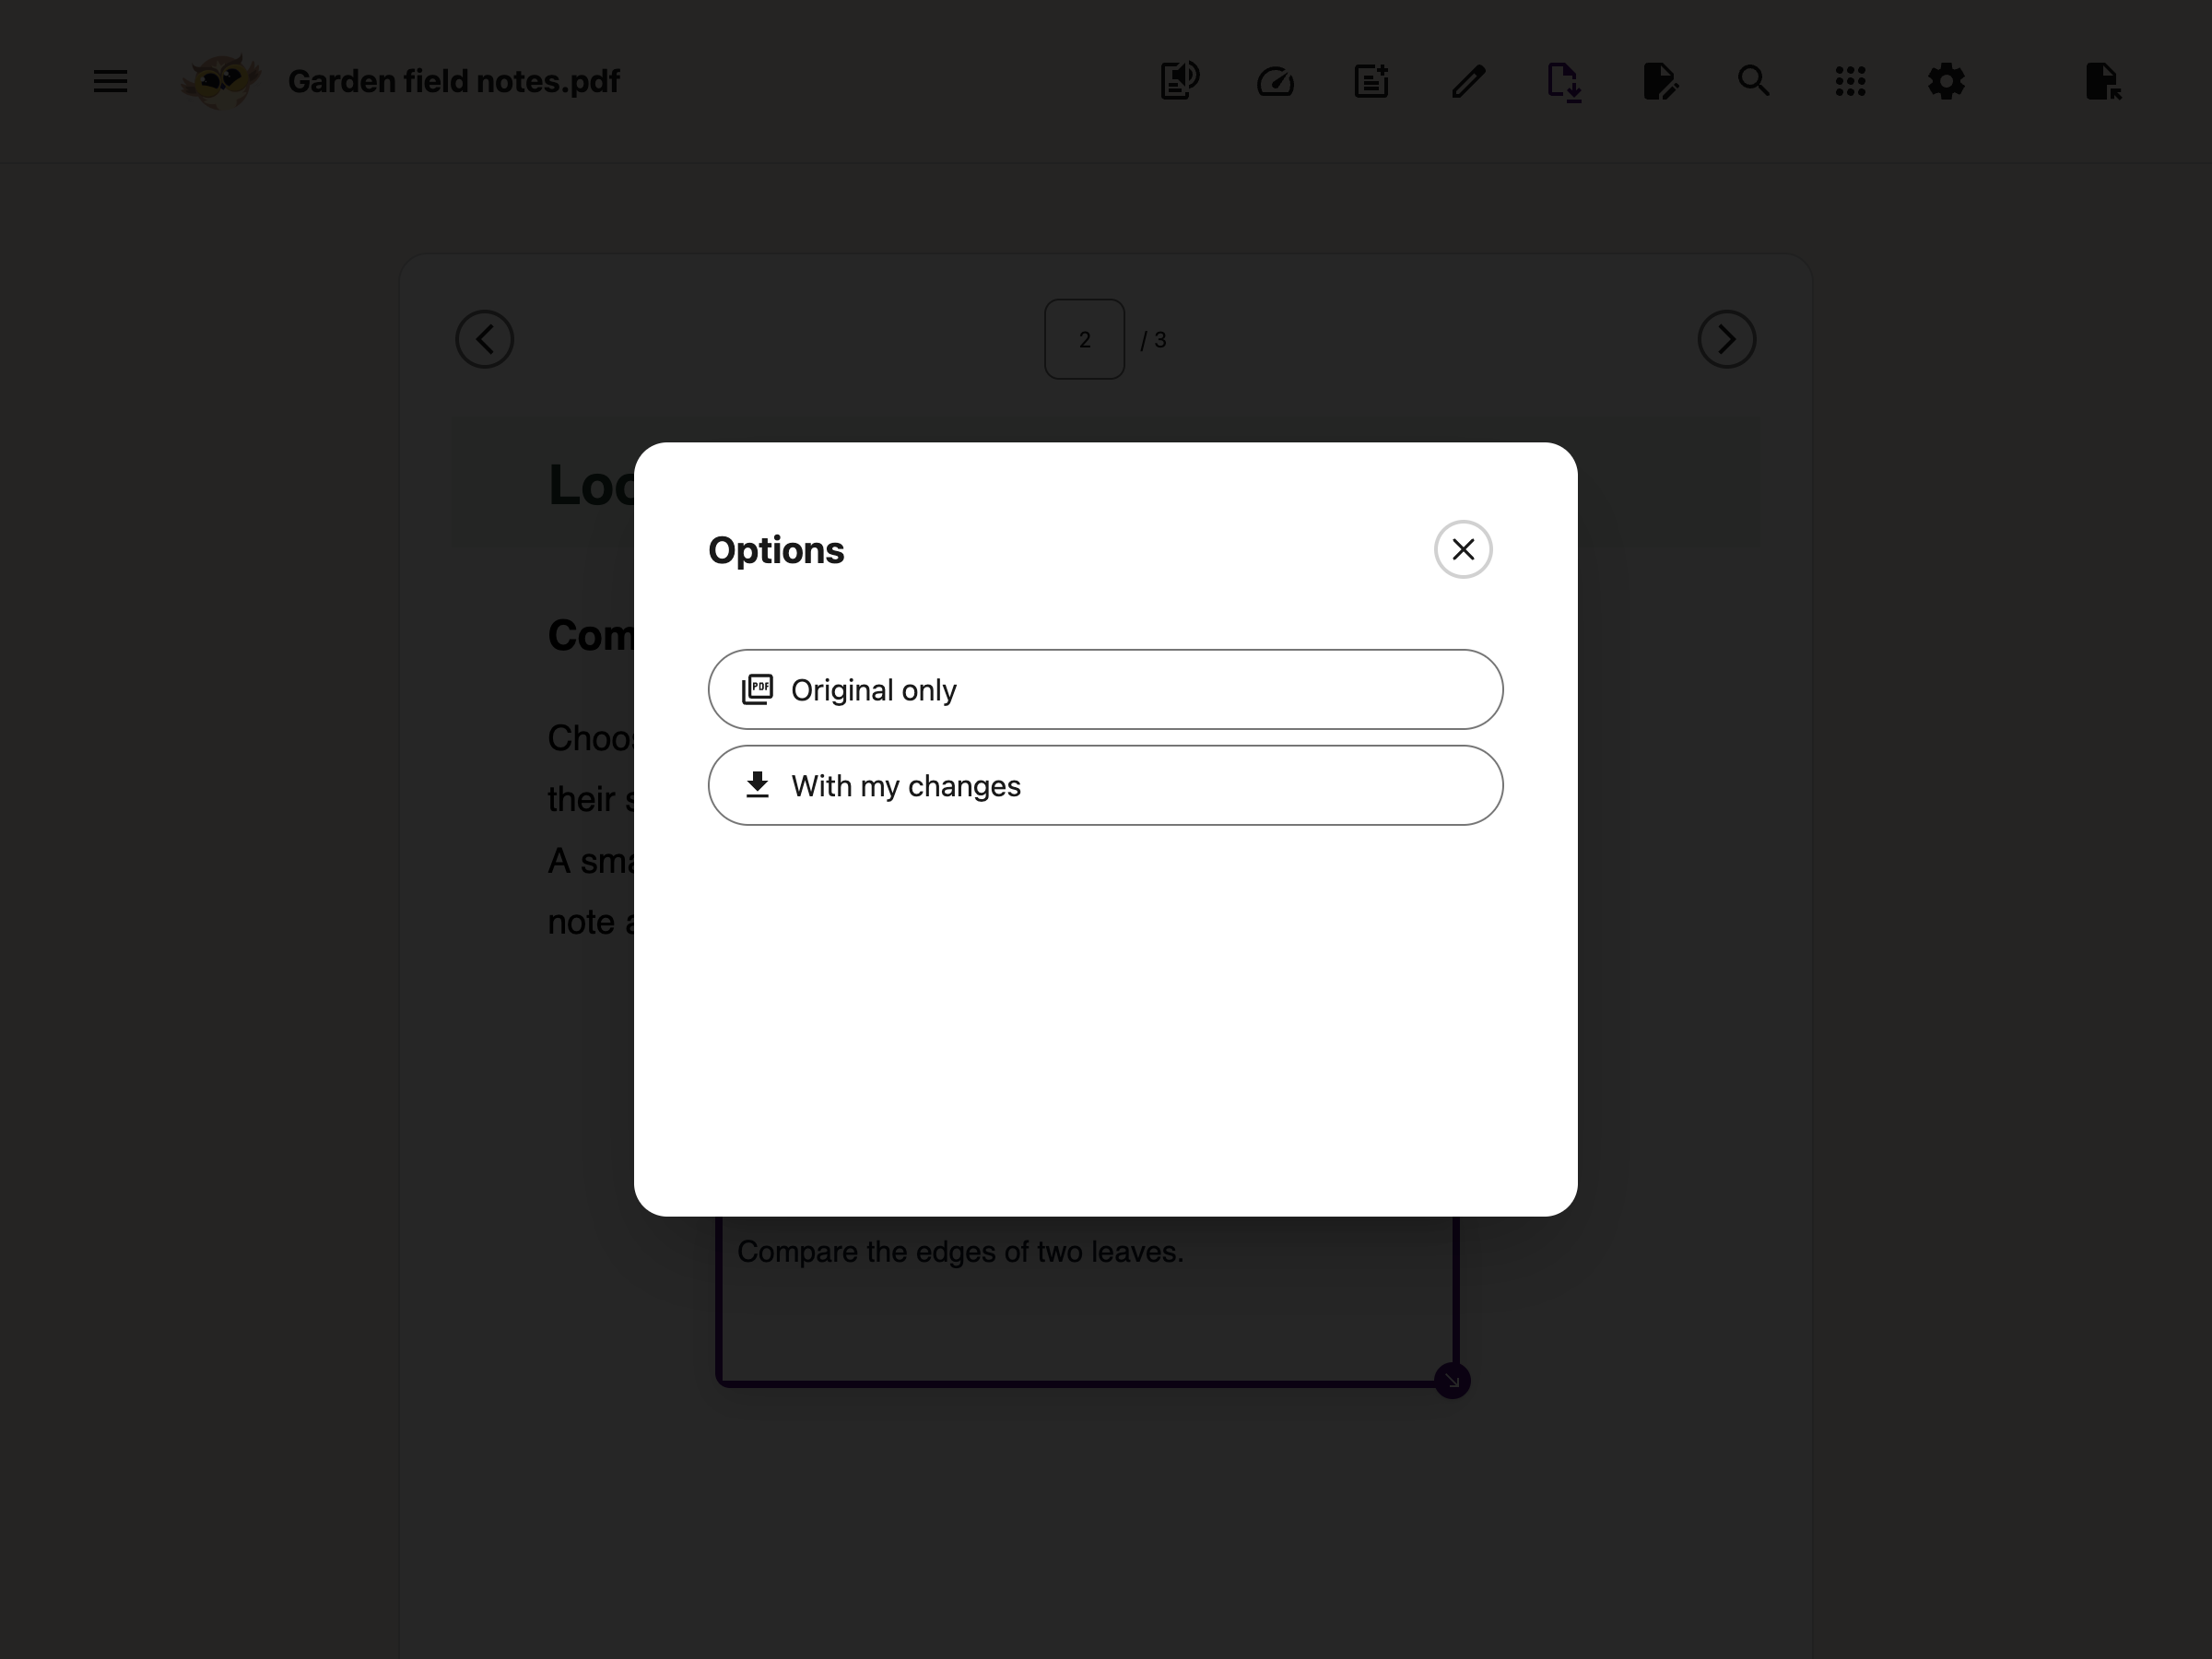
When you are finished, click the Download button (the download icon) in the toolbar.
A dialog will appear with two options. Choose With my changes to save the PDF with your drawings. Choosing Original only downloads the PDF without them.
Your PDF will be downloaded with all drawings and text annotations permanently embedded. The file works in any standard PDF reader.
 View full-size image (opens in a new tab)
Keyboard Shortcuts
When the drawing canvas is focused, you can use these keyboard shortcuts:
- Tab - Cycle through shapes on the current page to select them
- Arrow keys - Move a selected shape by a small amount
- Shift + Arrow keys - Move a selected shape by a larger amount
- Delete / Backspace - Delete the selected shape
- Escape - Deselect the current shape
Tips
- Use arrows to point reviewers to specific issues in a document.
- Use rectangles or ovals to frame sections that need attention.
- Combine text boxes and drawings for detailed annotations. Add a text box next to an arrow for context.
- Your drawings are saved per page, so each page keeps its own set of marks.
- If you open drawing mode while a text box is being added, drawing mode will close automatically to avoid conflicts.
Related Features
- Draw on a PDF with Your Keyboard - Place, move, resize and delete shapes without a mouse.
- Annotate and Export a PDF - The full start-to-finish walkthrough
- PDF Reader - Open and read PDFs with all of Helperbird's accessibility tools
- Add Text Boxes to PDFs - Type annotations directly onto PDF pages
- Text to Speech on PDFs - Have PDF content read aloud
- Extract Text from PDFs - Use OCR to pull text from scanned PDFs
- Immersive Reader - Read PDF text in a distraction-free format
- Highlight PDFs - Mark text with color-coded highlights
- PDF Drawing Tools Feature Page - Overview of all drawing capabilities
- Save and Download Annotated PDFs - Save your annotated PDF to your device
- Share and Export PDFs - Share annotated PDFs through Google Drive, email, or Classroom
Video Tutorial
Need Additional Help?
If you have any questions or run into any issues, please contact the Helperbird support team. You can reach us at Helperbird support. We are happy to help you get the most out of Helperbird.
Printed from the Helperbird Help Center · Updated September 28th, 2026
Questions? We are happy to help — helperbird.com/support