
How to Manage Your Sticky Notes and Highlights in Helperbird
Create, edit, search and export saved notes and highlights from the Highlights & Notes card in Helperbird NotePad.
Jump to the stepsOn this page
What This Guide Covers
The Notes app in Helperbird keeps what you have saved in one place. That means your sticky notes, your highlights, and any text you saved from a Screenshot Reader capture. Screenshot Reader needs Helperbird Pro.
This guide shows you how to manage that saved content. You will learn how to create new notes from the Notes app, edit your notes and highlights, delete items you no longer need, visit the original page where you created them, search, and export.
Who This Is For
- Students collecting quotes from several pages
- Readers who highlight as they go
- Anyone who saves text from a Screenshot Reader capture
Step 1: Open the Notes App
Click the Helperbird icon in your browser toolbar to open the Helperbird menu. Scroll down to the All Features section and click the arrow to expand it. Find the View notes row and click its open button.
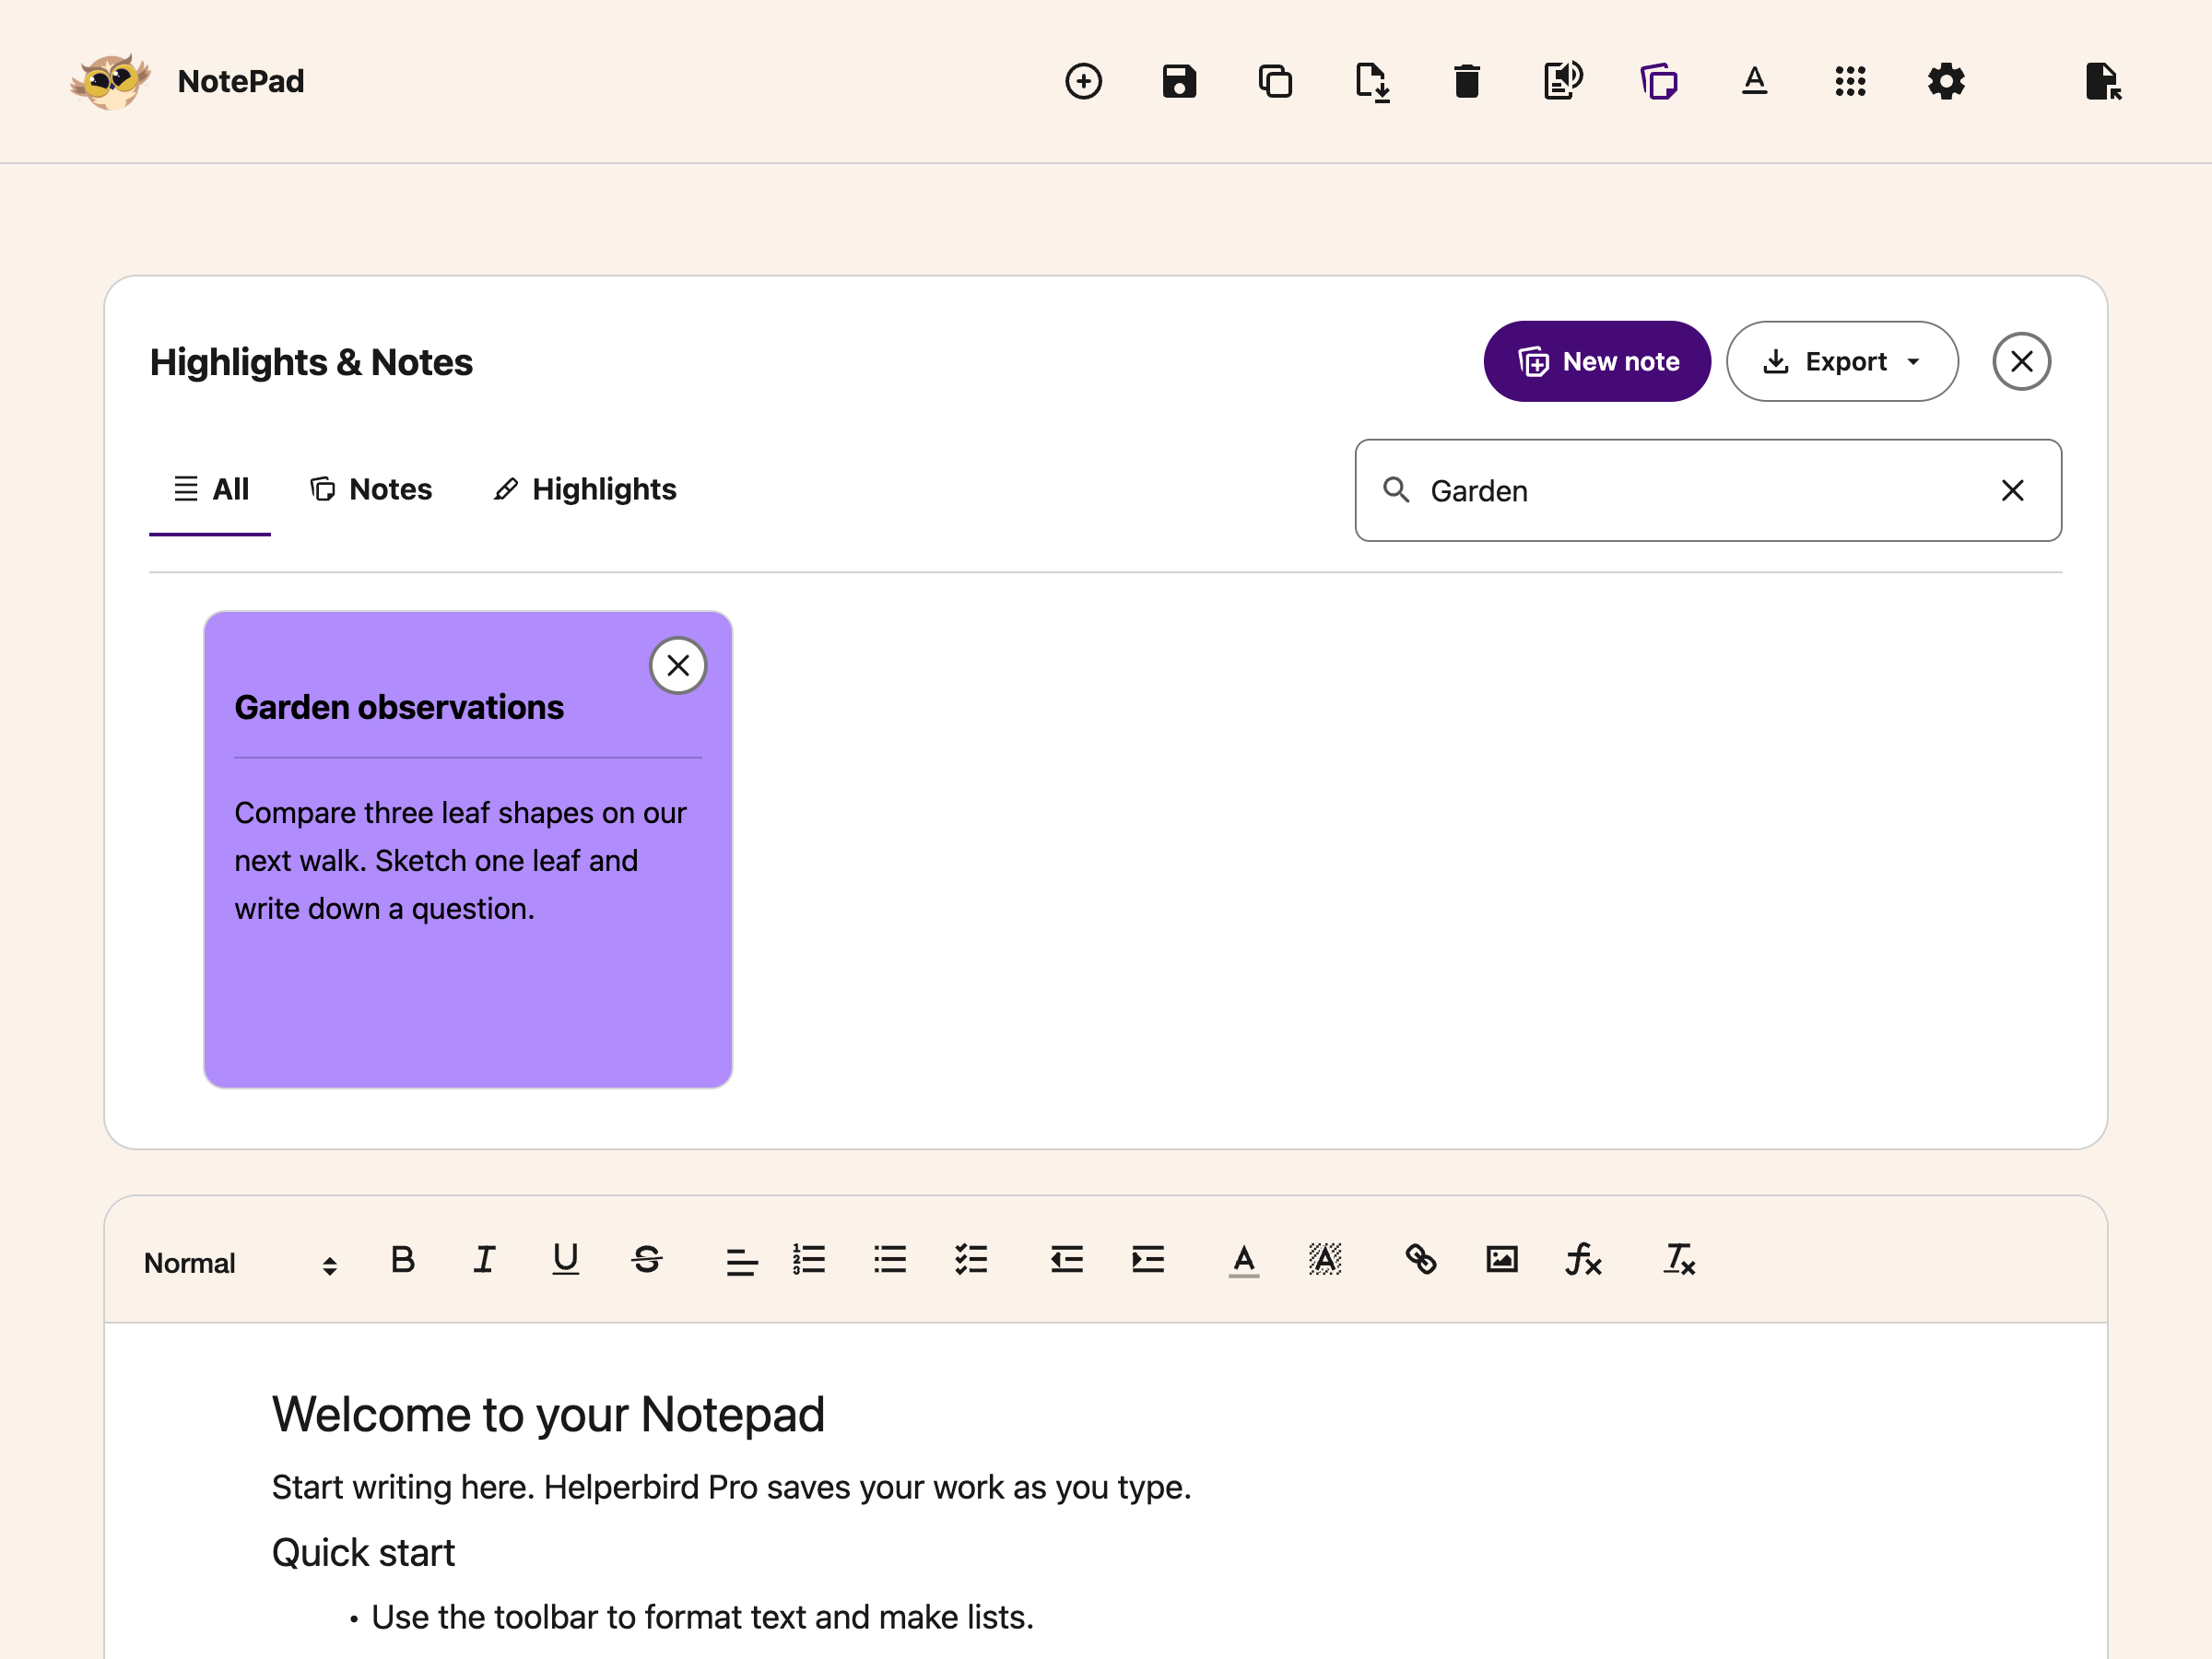
This opens NotePad with the Highlights & Notes card above your document. You can also show or hide this card with the Highlights & Notes button in NotePad's top toolbar.
On Safari a Notes tile is already pinned in Quick actions. On other browsers you can pin one there yourself.
Clicking a highlight on a web page opens Notes as well. See How to Highlight Text on Any Website.
If you have no saved items, the card explains how to get started and shows one New note button. Search, filters and Export appear once you save something.
 View full-size image (opens in a new tab)
Step 2: Create a New Note
You do not need to be on a website to create a note. You can create one right from the Notes app:
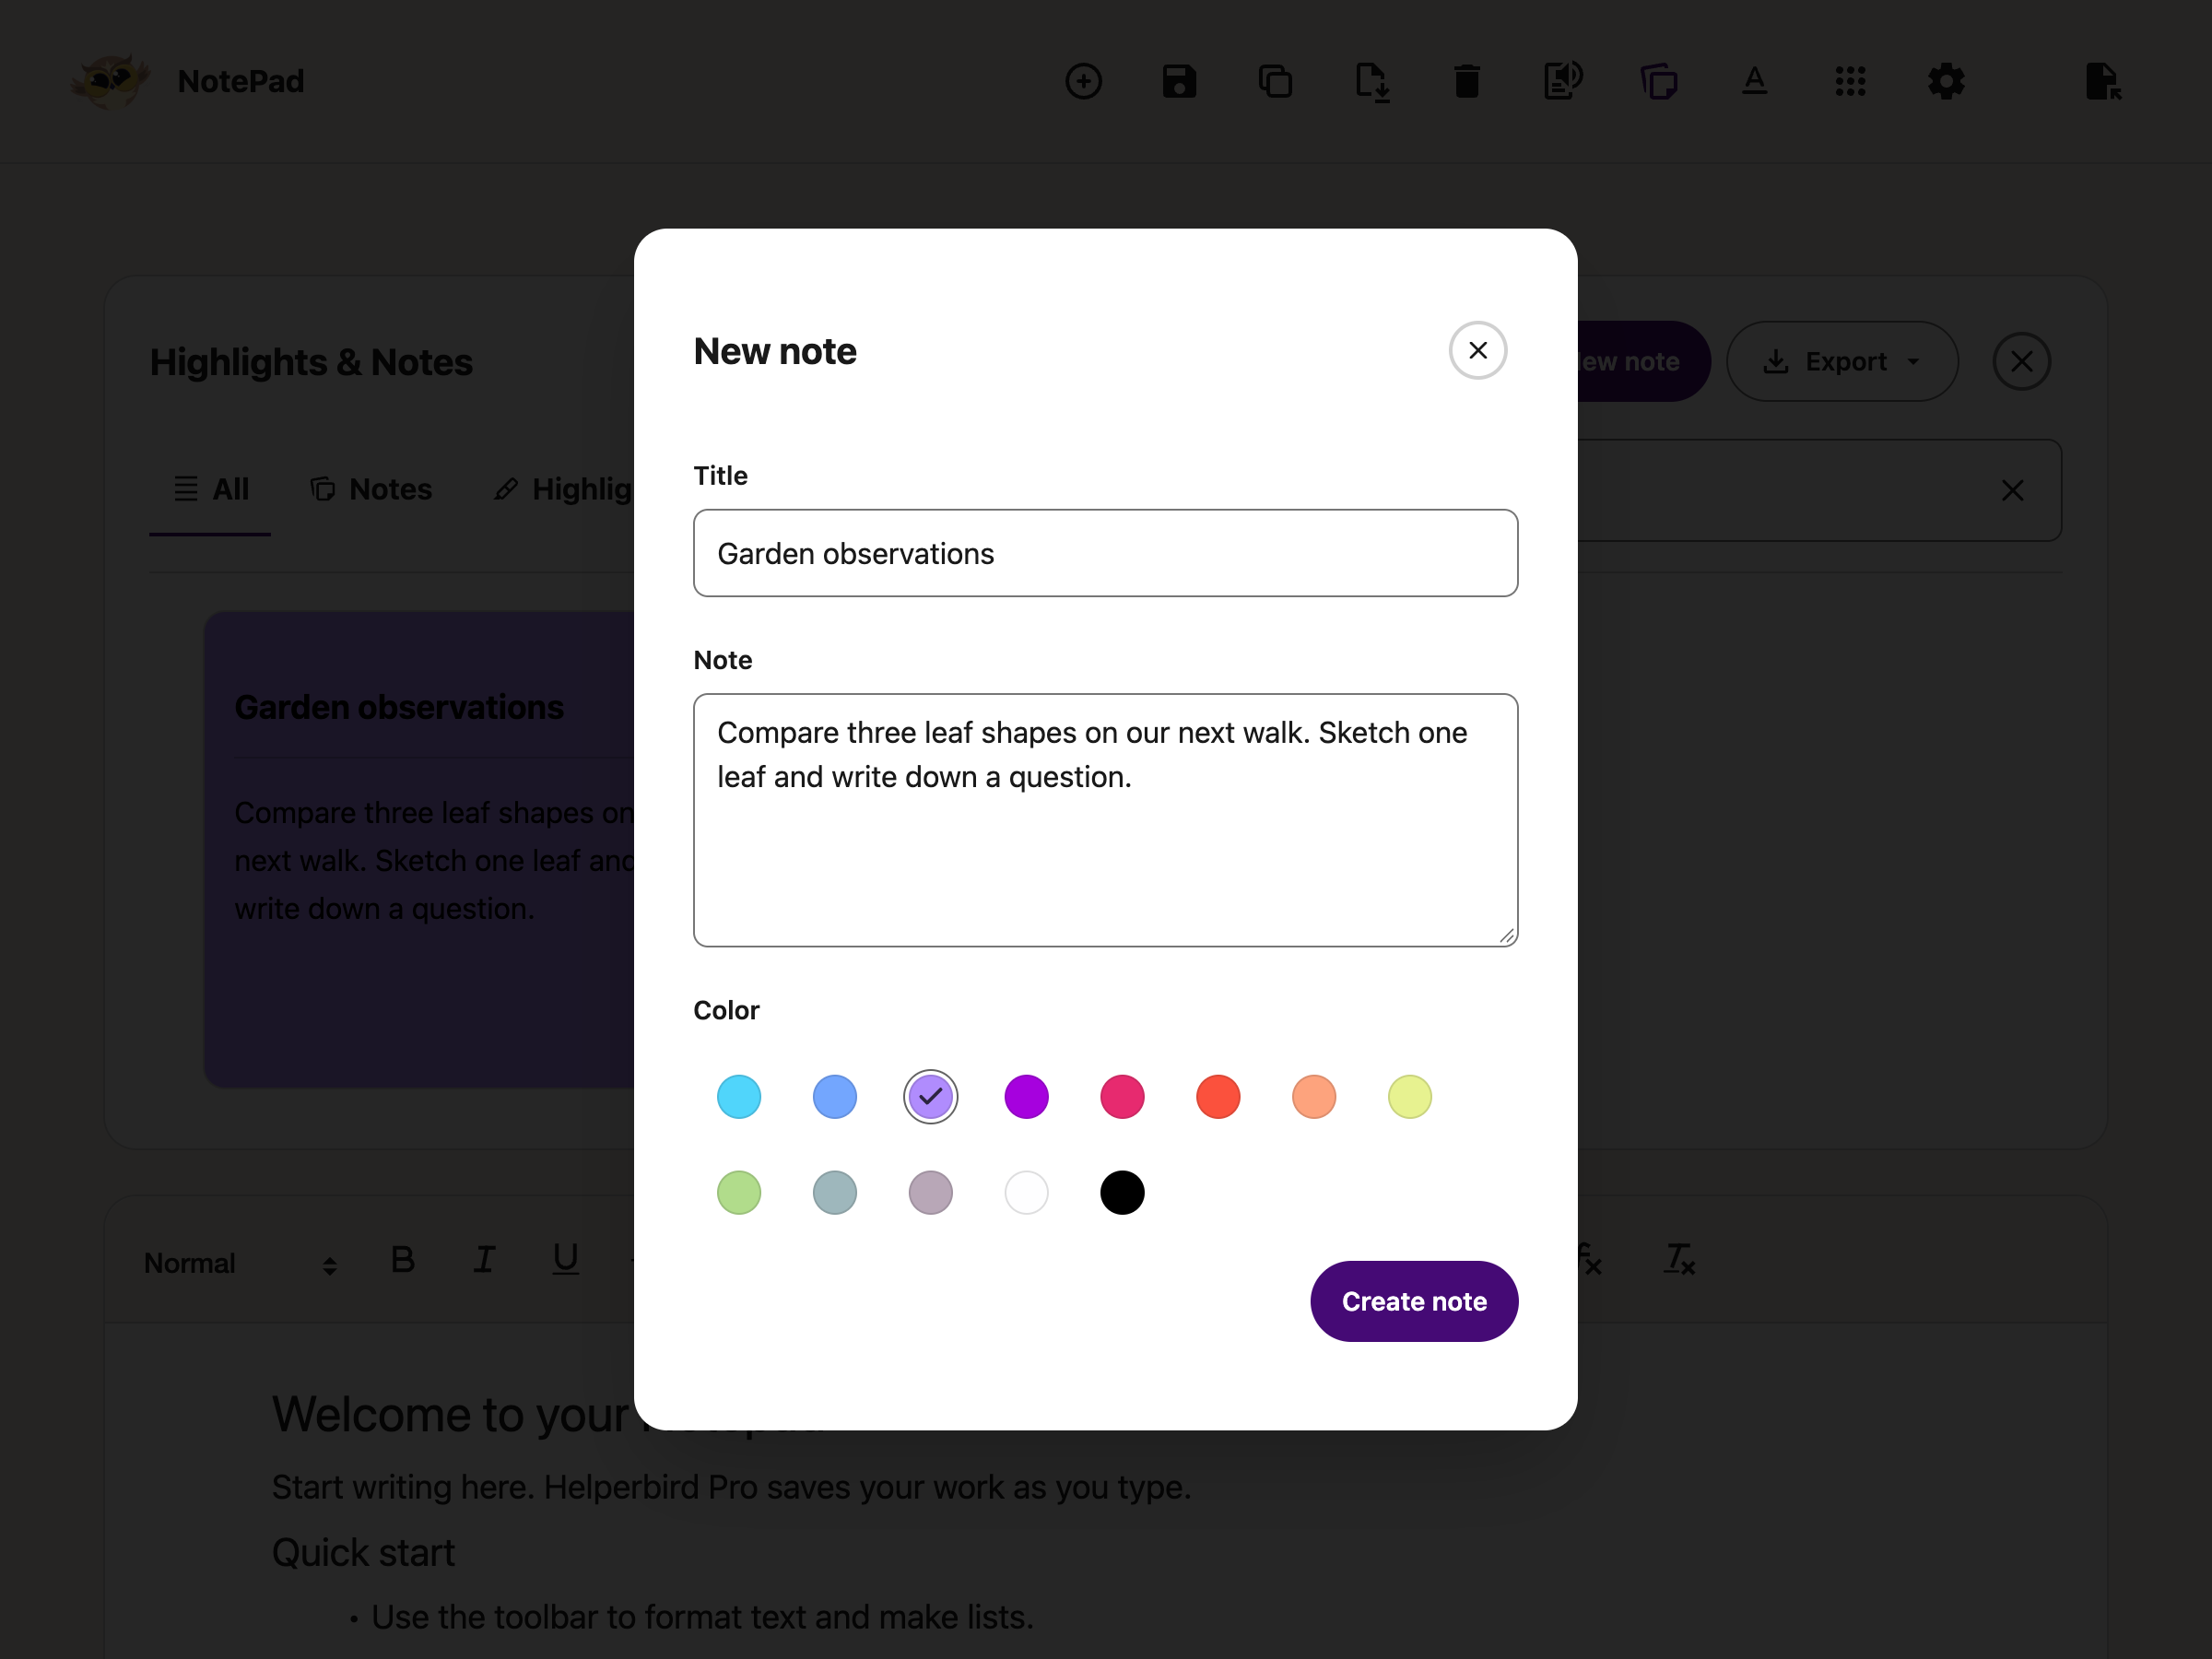
- Click New note in the card header, or in the empty card if you have no saved items
- Write your note in the Note field
- Add a Title if you want one
- Pick a Color
- Click Create note
 View full-size image (opens in a new tab)
Create note stays greyed out until the Note field has something in it. A title is optional and holds up to 120 characters. A note with no title shows on its card as Helperbird Note.
Notes created this way are stored in a General group, since they are not attached to any web page. This is a good way to write down quick ideas, to-do lists, or study notes that do not belong to a specific website.
Putting a sticky note on the web page itself is a different feature, and it needs Helperbird Pro. See How to Add Sticky Notes to Websites.
Step 3: Filter by Notes or Highlights
Once you have saved an item, filter tabs appear below the card header:
- All - Shows all your saved items
- Notes - Shows your sticky notes and any text you saved from a capture
- Highlights - Shows the passages you marked on a page
Click a tab to narrow down what you see. If that category has no items, the tabs and search stay available so you can change the filter.
View full-size image (opens in a new tab)
Step 4: Edit a Note
You can change a note at any time without leaving the Notes app:
- Find the note you want to change
- Click the note's card, or focus it with Tab and press Enter
- Update the Title, the Note text, or the Color
- Click Save changes
Your changes are saved right away, so the note is updated everywhere it appears.
Step 5: Edit a Highlight
Highlights can be edited too:
- Find the highlight you want to change
- Click the highlight's card, or focus it with Tab and press Enter
- Update the Title, the Description, or the Color
- Click Save changes
Note: The text you captured from the web page is shown at the top of the box and cannot be changed. This keeps your highlight a true record of what the page said. You can only edit the details around it, like the title and description.
Changing the color here also changes the color on the web page, the next time you load that page.
Step 6: Visit the Original Page
Open a note or highlight to find its source link. Follow that link to return to the original website in a new tab.
Note: Notes created directly in NotePad are not linked to a website.
Step 7: Delete a Note or Highlight
To delete a single sticky note or highlight:
- Find the note or highlight you want to remove in the Notes app
- Click the ✕ button in the top right corner of the card, labelled Delete note
- Choose Delete note in the confirmation, or Cancel to keep it
Export anything you want to keep before confirming deletion.
Deleting a highlight card also removes the color from the web page. A page you already have open keeps showing the color until you reload it.
Step 8: Delete Several Notes
The Notes app does not have a bulk delete option. Notes and highlights are removed one card at a time. If you want to clean up several notes or highlights:
- Use the filter tabs or the search box to narrow down what you see
- Click the Delete note button on each note or highlight you want to remove
Tip: If you want to keep a copy of anything before deleting it, export it first (see Step 10).
Step 9: Search Your Notes
Use Search notes and highlights… beside the filters. Your cards are filtered as you type. Search matches text, titles, categories and source websites within the selected tab.
If nothing matches, the search field stays visible. Use its Clear button to remove the query, or select All to search every category.
Step 10: Export or Print Your Notes
Before deleting notes, you may want to save a copy:
- Open Export in the card header, then choose Export as PDF or Export as Text
- Click each note or highlight you want to include. A bar appears above your cards showing how many you have picked
- Click the button in that bar to finish. It stays greyed out until you pick at least one card
Choose Cancel in the selection bar to leave the export without downloading.
Choosing Export as PDF opens your browser's print dialog, where you can save the notes as a PDF file or print a hard copy. If no window opens, check your popup blocker.
The exported PDF is built to be read and shared. It has a Helperbird header, and your notes are grouped by the website they came from. Each note shows a category badge and the date it was saved.
Choosing Export as Text downloads a plain text file. Every note is listed with its title, its category, where it came from, and its text.
To back up your notes in one file instead, see How to Export Your Helperbird Notes. The file that button downloads does not include your highlights.
Tip: Export important highlights and notes before cleaning up your Notebook, so you always have a backup of your research and ideas.
Good to Know
- Your notes move between your devices when your browser's own sync is turned on. The Sync setting in Helperbird has to be on as well.
- Cards do not show a date. The date you saved a note appears in the PDF export.
- Note colors come from a fixed set of thirteen. You cannot enter a color of your own.
- Your notes live in your browser's storage. If it runs out of room for synced data, new notes stay on that device and stop reaching your others. Nothing tells you this has happened.
Video Tutorial
Need Additional Help?
If you have any questions or run into any issues, please contact the Helperbird support team. You can reach us at Helperbird support. We are happy to help you get the most out of Helperbird.
Printed from the Helperbird Help Center · Updated September 25th, 2026
Questions? We are happy to help — helperbird.com/support